The purpose of this article is to explain and illustrate configuration steps for conditional validation. In the context of the article, conditional validation refers to an operation whereby validation for a secondary attribute is triggered/enabled when a condition on a primary attribute is met. The article extends concepts covered in our official Application Design Guide, and utilizes the best practice of combining a form validation (which shows useful information but is non-blocking) with a step validation (blocking), used when the user should be forced to fix an issue before proceeding.
In many cases, a Semarchy user may want to configure a form so that validation of one or more attributes is enforced on a conditional basis. For instance, validation on "attribute b" is only enforced if "attribute a" meets certain requirements. This type of conditional formatting is fully supported by the Semarchy xDM platform, we will demonstrate how to incorporate this operation by using the CustomerB2C model and artifacts, which are available through Semarchy Customer B2C Demo Tutorial.
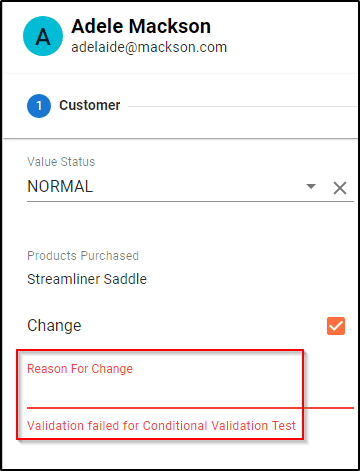
Our scenario involves two key attributes: Change(boolean), and Reason for Change(text). These two attributes are not a part of the Customer B2C metadata model, and must be added manually in order to follow along. The use-case stipulates that validation for Reason for Change should be dependent on whether Change meets a certain condition. If Change is True, then validation should be enforced on Reason for Change. Otherwise, not.
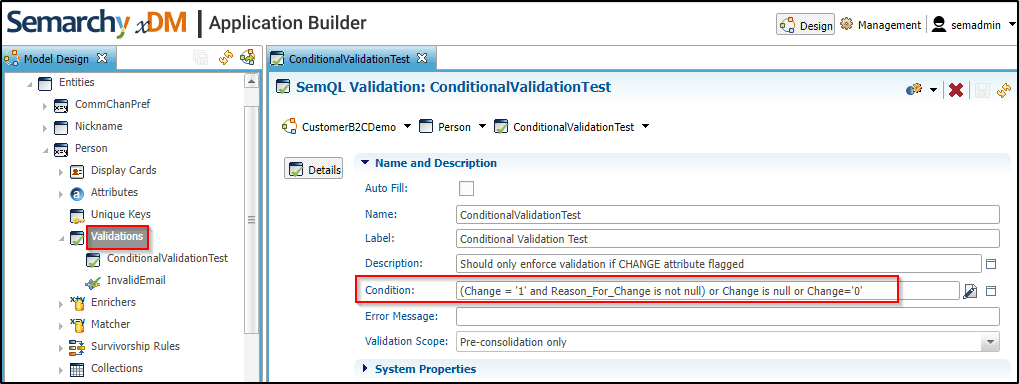
Step1: Create a new SemQL Validation, that includes a Condition that correlates to the appropriate use-case.
(Change = '1' and Reason_For_Change is not null) or Change is null or Change='0'
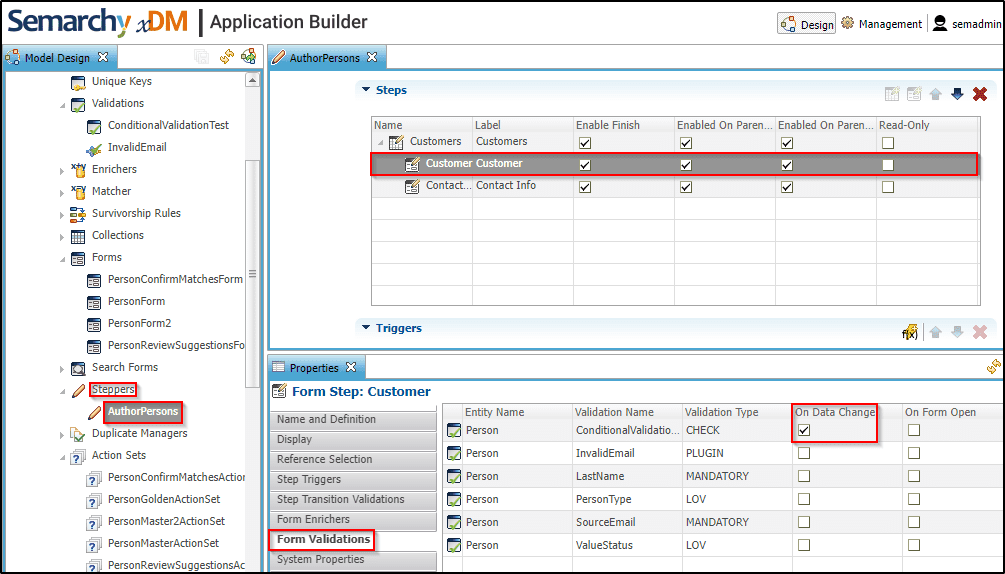
Step2: Under Steppers, select the appropriate form, followed by the appropriate option to run validations. After first clicking the appropriate form near the top of the page, navigate to the Properties section near the bottom of the page, then to Form Validations to set Form validation options.
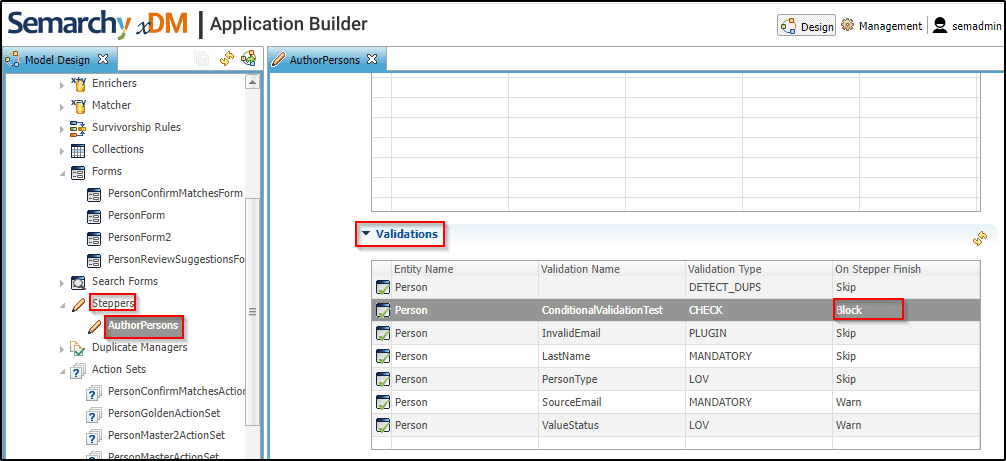
Step 3: On the related Stepper, confirm the Validation (ConditionalValidationTest) has been configured using the desired actions. Save changes and re-deploy model.
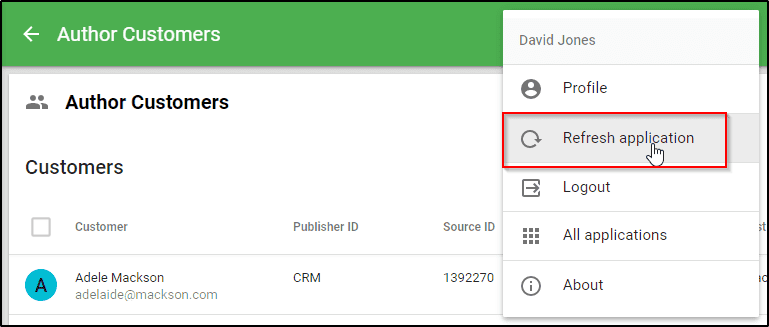
Step 4: Save all changes and re-deploy model. Within the Customer B2C application, select Refresh application.
After refreshing the application, users who have completed the previous steps should now see validation errors in the form, as shown below.